
How to Create a Multi-Step Form in Elementor Pro is a common question for anyone looking to improve user experience and boost form completion rates on their website. Long forms can overwhelm visitors, but by breaking them into smaller, easy-to-follow steps, you can make the process feel smoother and more engaging. In this guide, we’ll walk you through the entire process of building a multi-step form using Elementor Pro’s built-in tools—no extra plugins or coding needed. Whether you’re creating a contact form, quiz, or lead capture form, this step-by-step tutorial will help you do it with ease and style.
What is a Multi-Step Form in Elementor Pro?
A multi-step form in Elementor Pro is a type of form that splits input fields across multiple steps or pages, instead of showing all fields at once on a single screen.
How to Create a Multi-Step Form in Elementor Pro?
Step 1: Add a New Form Widget
- Open your page with Elementor.
- Drag and drop the Form widget onto your page.
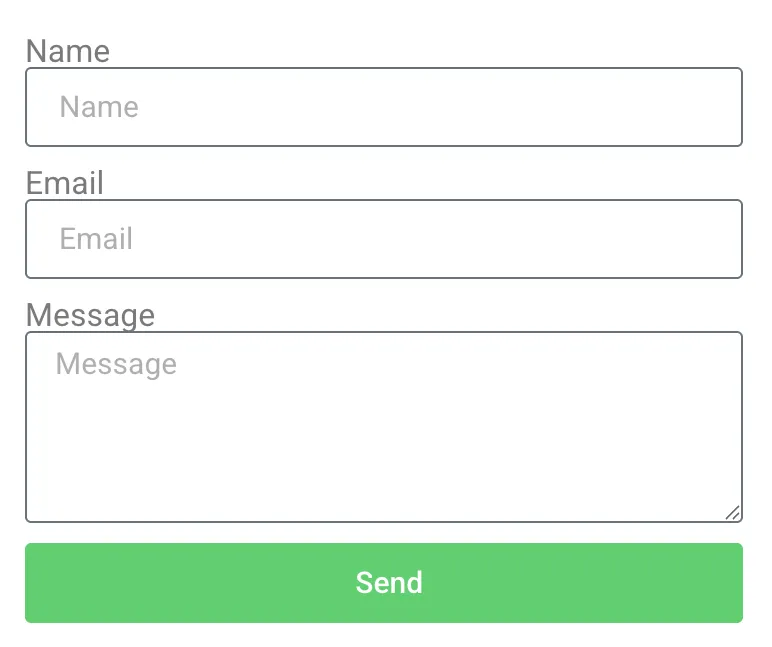
- You’ll see a default form with Name, Email, and Message fiel
Step 2: Add Multiple Steps
Elementor allows you to add steps using the “Step” field type.
- In the Form Fields section, click “Add Item”.
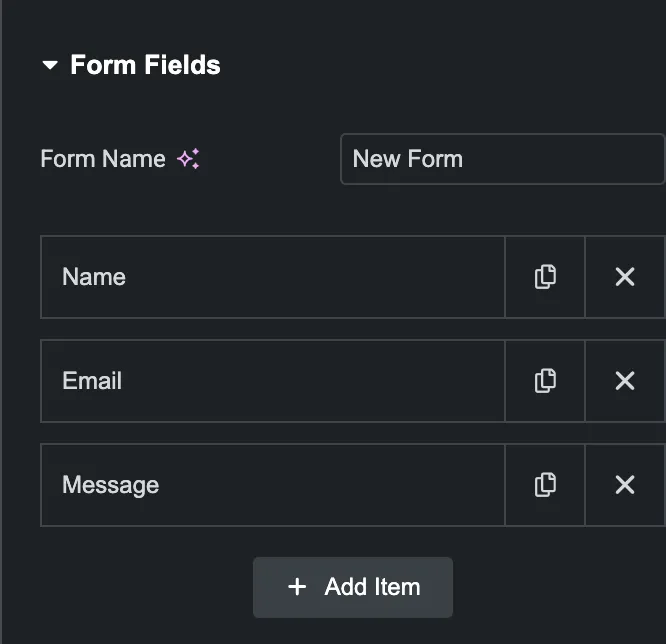
- Change the field type to “Step”.
- Add a label for each step (e.g., “Step 1”, “Step 2”).
Add a Step field before the group of fields you want in that section. Each Step field acts like a divider between steps.
Example Layout:
- Step 1
- Name
- Email
- Name
- Step 2
- Phone
- Address
- Phone
- Step 3
- Message
- Submit Button
- Message
You can re-order the fields using drag-and-drop.
Step 3: Customize Buttons
By default, Elementor adds Next and Previous buttons for navigation.
To customize them:
- Scroll down to the “Buttons” section.
- You can change:
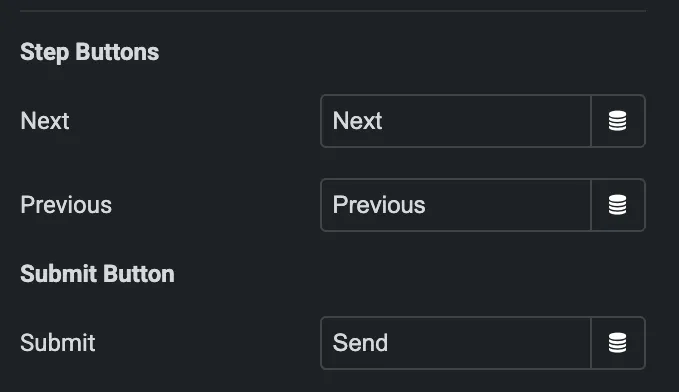
- Next Label (e.g., “Continue”)
- Previous Label (e.g., “Back”)
- Submit Button Text (e.g., “Send Now”)
You can also style each button individually in the Style tab.
- Elementor Pro
- Divi
- Essential Addon
- Templately
- WPForms
- Fluent Forms
- ACF Pro
- Prime Slider
- Woostify theme
Step 4: Configure Actions After Submit
To set what happens after the form is submitted:
- Go to the “Actions After Submit” panel.
- Choose your action (e.g., Email, Webhook, Redirect).
- Configure each action as needed.
For email notifications, make sure to set the correct To and From Email fields.
Step 5: Style the Form
Now go to the Style tab to adjust:
- Colors for each step
- Progress bar (optional)
- Input field styling
- Button hover effects
Elementor Pro gives you full control over every element’s look.
Step 6: Test the Form
Before publishing:
- Test on desktop and mobile
- Fill out all fields to ensure each step works
- Check if the final action (e.g., email or redirect) works properly
Pro Tips
- Progress Bar: You can show progress indicators for better UX (found under Form > Additional Options).
- Conditional Logic: Use custom code or third-party add-ons (like Elementor Custom Forms Addon or [Crocoblock JetFormBuilder]) to create logic-based forms.
- Accessibility: Make sure each step is clearly labeled for screen readers and navigation.
Special Features of Multi-Step Forms in Elementor Pro
1. Built-in “Step” Field Type
- Easily divide your form into multiple steps without coding.
- Drag and drop a Step field before any section of the form to start a new step.
2. Next / Previous Navigation Buttons
- Automatic buttons for users to navigate between steps.
- Labels can be customized (e.g., “Next Step,” “Go Back”).
3. Progress Indicators
- Optional visual progress bar that shows users how far along they are.
- Can be styled to match your brand.
Improves engagement and reduces form abandonment.
4. Independent Field Validation per Step
- Fields in each step can be required and validated before moving to the next step.
- Prevents incomplete or incorrect submissions.
5. Responsive Design
- Mobile-friendly navigation with swipe or tap gestures.
- Steps stack properly on all screen sizes.
6. Fully Customizable Design
- Style every part of the form: buttons, progress bar, input fields, and even error messages.
- Use Elementor’s styling controls for spacing, typography, and animation.
Bonus: Developer-Friendly
- Use Elementor’s Form ID and custom classes to target specific steps with JavaScript or custom CSS for advanced behavior.
- Integrates with Elementor’s Dynamic Tags for personalized form behavior.
- Elementor Pro
- Divi
- Essential Addon
- Templately
- WPForms
- Fluent Forms
- ACF Pro
- Prime Slider
- Woostify theme
Conclusion
Creating a multi-step form in Elementor Pro is a powerful way to enhance user experience, reduce form abandonment, and increase conversions. By breaking your form into clear, easy-to-follow steps, you guide users through the process without overwhelming them — perfect for lead generation, applications, surveys, and more.
With Elementor Pro’s Step field, custom button controls, progress indicators, and styling options, you have everything you need to build a beautiful and fully functional multi-step form — no extra plugins or coding required.
Take the time to test your form on all devices, optimize each step for clarity, and connect it with your desired actions (email, redirect, integrations) to create a seamless and professional form experience.

