To use Motion Effects in Elementor Pro: (1) select any container, column, or widget and open Advanced → Motion Effects, (2) select between Scrolling Effects (parallax, blur, scale, rotate) or Mouse Effects (mouse track, 3D tilt), (3) configure entrance animations (Fade In Up, Slide In, Zoom) with custom duration and delay, and (4) verify hardware acceleration by previewing on mobile viewports.
Key Takeaways
- Motion Effects add interactive 3D tilt, mouse tracking, parallax scrolling, and entrance animations.
- Apply subtle transform effects on hover states to give buttons and cards tactile feedback.
- Limit simultaneous animations on a single screen to prevent GPU and CPU rendering lag.
- Respect user prefers-reduced-motion browser accessibility settings.
Want to make your website more engaging and interactive? With motion effects in Elementor, you can easily add smooth, eye-catching animations that enhance user experience and increase visual appeal. In this article, we’ll walk you through exactly how to use motion effects in Elementor Pro — step by step.
What Are Motion Effects in Elementor?
Motion effects in Elementor are animation features that let you control how elements move or appear as users interact with your page — whether they scroll, hover, or load a section.
These effects help create dynamic pages without writing any code, and they’re available exclusively in Elementor Pro.
Types of Motion Effects in Elementor
Elementor Pro offers a variety of motion effects you can use, including:
- Scrolling Effects – Parallax, rotate, transparency, blur, scale, and more.
- Mouse Effects – Track mouse movement for interactive elements.
- Entrance Animations – Fade, slide, zoom, bounce, and other entrance styles.
- Sticky Effects – Make elements stay in view while scrolling.
How to Use Motion Effects in Elementor Pro
Here’s a step-by-step guide to using motion effects in Elementor:
Step 1: Open Elementor Editor
- Go to the WordPress dashboard.
- Open the page you want to edit with Elementor Pro.
Step 2: Select the Widget or Section
- Click on the widget, column, or section where you want to add the motion effect.
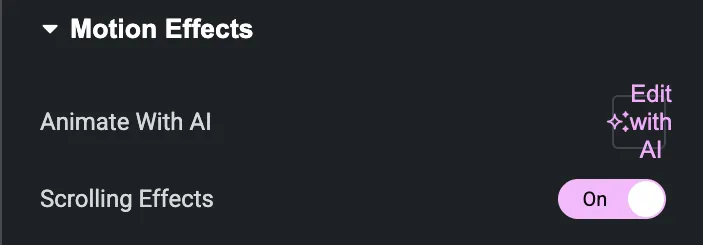
Step 3: Go to Advanced → Motion Effects
- In the left panel, go to the Advanced tab.
- Scroll down and click on Motion Effects.
Step 4: Choose Your Effect
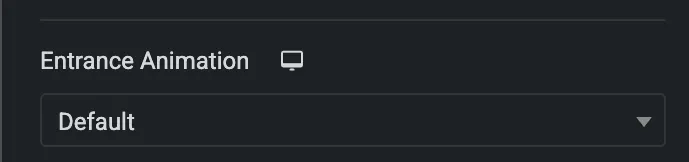
- Entrance Animation: Choose how the element enters (e.g., Fade In, Slide In).
- Scrolling Effects: Toggle it ON and choose effects like:

| Animation Type | Description |
| Vertical Scroll | Moves the element up or down based on scroll position. |
| Horizontal Scroll | Moves the element left or right. |
| Transparency | Fades the element in or out while scrolling. |
| Blur | Adds a blur effect during scroll. |
| Rotate | Rotates the element as the user scrolls. |
| Scale | Zooms in or out on scroll. |
Choose one or combine several depending on the effect you’re going for.
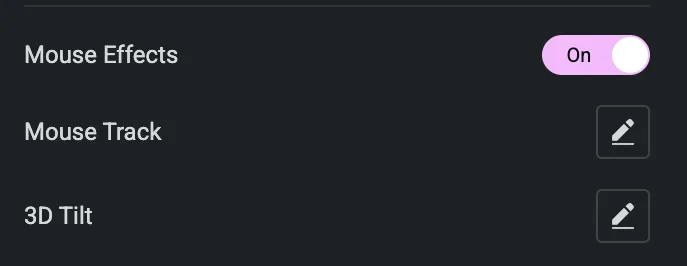
- Mouse Effects: Add mouse track or 3D tilt to respond to mouse movement.
Sticky Effects – Make elements stay in view while scrolling.

Step 5: Customize Animation Settings
Each motion effect comes with advanced settings:
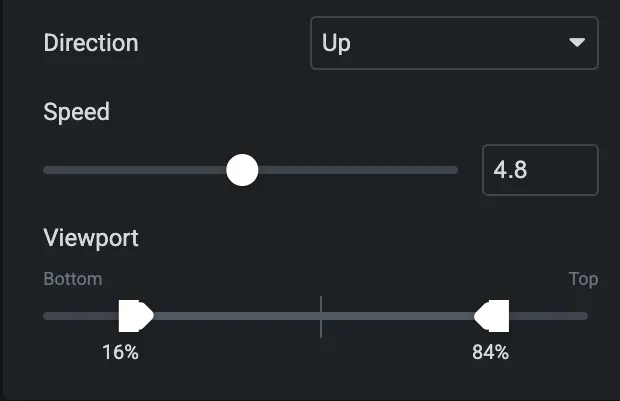
- Viewport: Choose when the effect starts (e.g., when 30% of the element is visible).
- Speed and Direction: Control the pace and movement direction.
- Viewport Range: Set the start and end points of animation while scrolling.
Use Cases
- Hero sections that subtly animate as you scroll
- Images that float based on mouse movement
- Call-to-action buttons that animate on entrance
- Dynamic headers or sections that rotate or scale
- Interactive background elements that move with cursor
Best Practices for Using Motion Effects in Elementor
- ✔ Use sparingly: Don’t overload your site with effects — it can slow down performance.
- ✔ Keep UX in mind: Motion should enhance usability, not distract from content.
- ✔ Test responsiveness: Always preview motion effects on tablet and mobile.
- ✔ Combine effects: Use entrance + scroll or sticky + fade for layered interactions.
Conclusion
Motion Effects in Elementor Pro provide a powerful and visually engaging way to bring your website elements to life. With features like scrolling effects, mouse tracking, entrance animations, and advanced controls for responsiveness and timing, you can create dynamic user experiences without needing to write a single line of code. Whether you’re designing subtle transitions or eye-catching interactions, Motion Effects allow you to enhance storytelling, guide user attention, and elevate the overall look and feel of your site.
Used thoughtfully, these effects can significantly improve engagement and help your content stand out — all while maintaining performance and responsiveness across devices.
Mouse Tracking & 3D Tilt: Creating Tactile Depth
In addition to scroll-based animations, Elementor Pro allows elements to react directly to cursor movements across the viewport:
- Mouse Track: Moves the element in the direction of (or opposite to) mouse travel. Perfect for creating layered multidimensional hero sections where floating badges or ambient shapes glide gently as the user explores the page.
- 3D Tilt: Rotates the element along its X and Y axes relative to cursor proximity. Ideal for portfolio feature cards, tech SaaS dashboards, and pricing tiers to give them a tactile, physical card feel.
Entrance Animations & Staggered Delay Chains
Rather than loading all elements in a section simultaneously, use staggered entrance delays to guide the reader’s eye:
- Set Card 1 Entrance Animation: Fade In Up, Duration:
Normal (450ms), Delay:0ms. - Set Card 2 Entrance Animation: Fade In Up, Duration:
Normal (450ms), Delay:150ms. - Set Card 3 Entrance Animation: Fade In Up, Duration:
Normal (450ms), Delay:300ms. - This creates a cascading rhythm that feels refined, premium, and intentional.
Need custom interactive front-end development, GSAP micro-interactions, or high-performance Elementor builds? Discover our WordPress development services at CV World.
Frequently Asked Questions
Ready to Build Professional Websites Faster?
Supercharge your WordPress design workflow with 100+ premium widgets, theme builder capabilities, and dynamic WooCommerce templates.
Elementor motion effects are hardware-accelerated via CSS transforms. However, on smartphones, it is best practice to toggle OFF mouse tracking and heavy 3D tilts to conserve device battery life.
Yes. Entrance animations in Elementor automatically fire using an IntersectionObserver only when the element enters the visible viewport.
Yes. Under the Custom CSS tab, you can override animation durations using animation-duration: 0.8s !important;.
No. Motion effects compile into clean CSS classes and lightweight native JavaScript that cache cleanly with LiteSpeed and WP Rocket.
No. When implemented using modern clean-code standards, responsive Flexbox containers, and server-side caching, your website maintains rapid sub-second loading speeds and easily passes Google Core Web Vitals assessments.
Need Custom Elementor Pro Development or Speed Optimization?
Partner with CV World lead WordPress engineers for custom Theme Builder development, WooCommerce integrations, and guaranteed 90+ Core Web Vitals.